
In case you haven’t been keeping up with retro trends, hooping has been making a comeback. Both guys and girls have been picking up PVC tubing and shaping them to their will. Sometimes they add a bit flare to their hoops with strings of LED lights and a controller chip to make them blink and change colors. These hoops can be used to paint with light when shot as a long exposure.
There are a few things that you need to know to get a good light-painted photos.
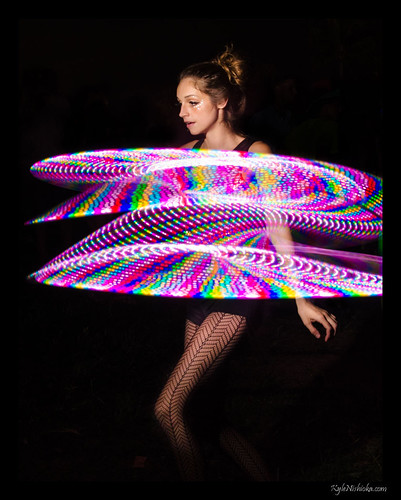
1. LEDs are relatively dim by photography lighting standards. In dark conditions, they stand out pretty well, but they don’t light up the subject in any meaningful way. The LED hoop in the photo above was especially bright. I’d guess it is roughly 1 – 2 stops brighter than the other hoops I’ve photographed. Even so, the subject is lit by a SB-900 from camera left. And notice that you can’t see any ghosting of the subject from the LED lights.
2. To balance the light between LEDs and flash, meter your exposure for the LEDs and add fill flash to light the subject. You only want to add a kiss of light for fill.
3. Generally you do not want to spill light on the background so keep the power level pretty low, take the flash off of the camera and move it close to the subject. If you have a snoot or grid, that will work even better to minimize the spill.
4. Use bulb mode w/ rear curtain (or 2nd curtain) sync to control the start and stop of the capture. It doesn’t really matter when you start the exposure, but you will want to close the shutter before the hoop has made too many revolutions. Rear curtain sync captures the subject at the end of their move.
Above all else, the thing to remember is that the photo should be about the hooper and not the hoop. Try to time the capture so that their face is not obscured by light trails. But don’t let that stop you from experimenting or letting the hooper show off their moves.