Star trails are more fun than time lapse photography in my opinion. Mostly because I like to show the effect of time passing in a single frame. There is something about long exposures and capturing a pattern. When images are strung together into a time lapse video it is easy to appreciate the motion, but it is just as easy to forget it a second later. Here are a few tips To make a memorable star trail photo.
Basic Tips
- All of the tips from Night Photography apply to shooting star trails.
- When choosing your spot to shoot star trails, you want to have as little light pollution as possible. But, it is not really practical to go far enough away from civilization to eliminate all light pollution. You will inevitably get some glow from a city somewhere on the horizon. Don’t worry so much about that, just concentrate on how many stars you can see with your naked eye. If you can see the milky haze of the Milky Way, your view is more than good enough for star trails.
- Shoot your star trails during or around the nights of a new moon. Moonlight is basically light pollution and there’s no where you can go to get away from this source of light pollution.
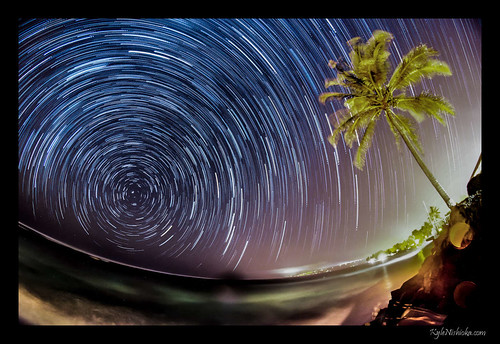
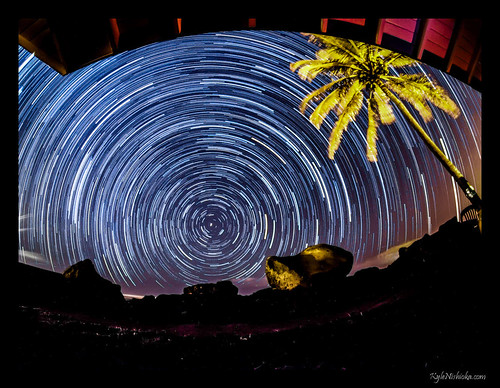
- Wider is better. Capture as large of a pattern as you can with a wide angle lens. Fisheye lenses are especially trippy for these type of photos since you are primarily angling the lens upwards. The distortion enhances the trails.
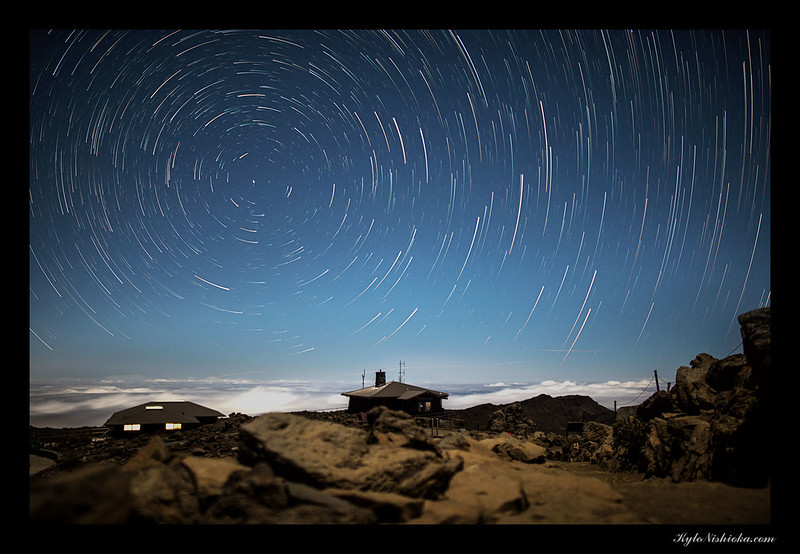
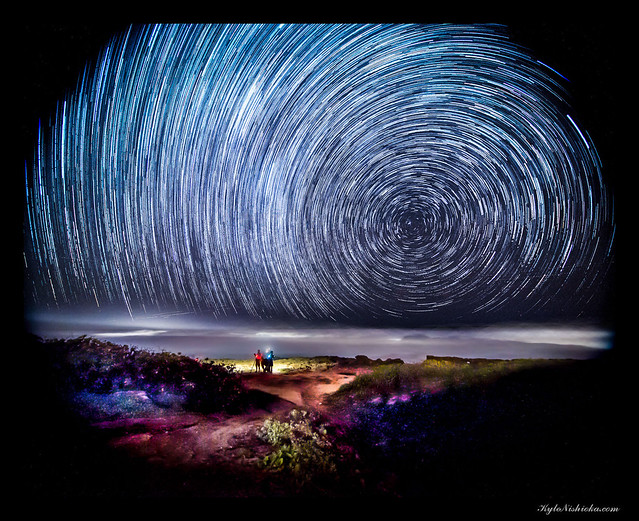
- The north star (Polaris) is practically stationary in star trails since it is almost perfectly aligned with the rotational axis of the Earth. The other stars loop around Polaris and you can use that to your advantage when composing your shot.
- Invest in a camera body that has a built-in intervalometer. Or get a remote trigger that has one. And yes, the cheap Chinese ones on Ebay are good enough. One way or another the camera should be set to take the shots on auto-pilot.
Advanced Tips
- Cloud cover. So long as passing clouds keep moving through your frame they don’t ruin your star trails photo. Or not as much as you might fear when you are out in the field. The long exposure needed to capture star light thins out the clouds and you still have a largely useful frame. Now if the whole sky stays cloudy, your outing is pretty much a lost cause, but don’t give up after the first big wave of clouds pass by. Now this star trail above had only one thick set of clouds that concerned me. It rolled right through the scene and it looks like a solid cloud bank, but that is just the stitching process smudging the cloud across the frame.
- Move and recompose after you’ve gotten about 50 – 75 shots. I know it would be epic to shoot a single sequence spanning the whole night. Then stitch the photos together to make some really long trails. But, if you can’t make this kind of a trip every night, you should make the most of your time by shooting just enough frames to make a decent size trail then move on to the next scene.
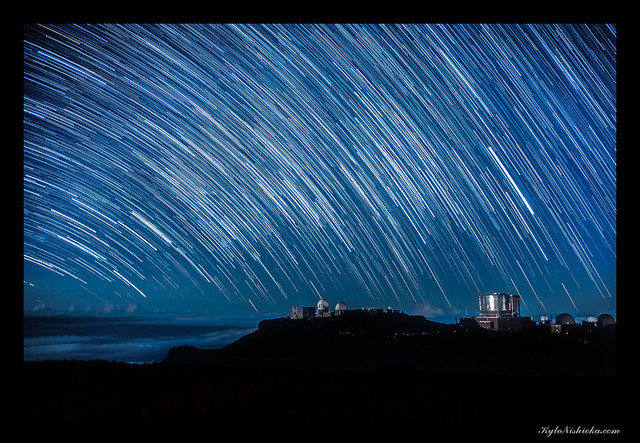
- The star trails should be the background of your photo, not the subject. If you can find an awesome landscape (or nightscape) that has star trails in it, that will be at least a dozen times better than pointing a lens straight up at the stars.
- Learn to focus manually, in the dark, and possibly without live view. You may have heard of the trick where you focus using live view and magnifying the image on the LCD to dial in your focus. But, if the stars are faint, you won’t see them well enough to focus even with live view. Instead look on your lens’s focus ring and find the mark for infinity. Use that as a starting point to fine tune focus if the stars are bright enough to show up on live view.
- Be mindful of the wind and the vibration it can cause on your camera & tripod. The lower your camera is to the ground, the better your shots will come out. That, and you can sit on the ground and look through the viewfinder to compose your pics. It’s better than crouching if you had set up the tripod to your standing eye level.
- A lot of the finishing touches, not to mention the star trail stacking, is done in post production. Edit your photos before running them through the star trail stacking software. Adjust your exposure, noise reduction, contrast and sharpening prior to processing the star trails.
- Once you have the stacked star trails, take the photo back into Photoshop and do some more cleanup. You may possibly want to use just one of the foreground shots from the series to replace the blended foreground that came out of the star trails stack. Composite the foreground on top of the trails and mask away whatever you don’t want to see.
One last part I almost forgot to mention. The software I used to create the star trails is StarStaX and Startrails. Either of these programs will automatically stack your photos and create the star trails. They are both free programs and do not need Photoshop or any other image editing software to run. StarStaX is cross platform and runs on Windows, Mac & Linux. StarTrails is Windows only.