
Following up on the basic tips from Part 1, the tricks to making fire photographs involve a fair amount of knowledge of fire dancing itself.
Starting with safety, you the photographer have to be aware of how close you can get to the performers. Professional fire artists will mark their performance area with a Do Not Cross line that is usually a strip of warning tape or a row of traffic cones. Then there is another restricted area where they keep their fuel and do all of their preparations. If there’s no security people watching the crowd, you have to be aware of these boundaries because the fire safety staff are watching the performers waiting to intercept that stray fireball from hitting the either the fuel or the public. When you get too close…and you will…just back away and reset for the next shot.
It also helps to know what kind of fuel the performers are working with because that will affect your exposure settings. The most common fuel is “white gas” or Coleman’s camping fuel. It is very bright, burns without much smoke, and makes the usual yellow-orange fire you expect to see from a camp fire. Less common is lamp oil, which also burns pretty brightly, but makes a lot more smoke and burns longer than white gas does. And even less common is any high-proof alcohol solution. Alcohol burns less brightly compared to white gas and burns out quicker too. I hear burners joke about using unleaded gasoline in the “old days” but I don’t really expect to see anyone use that anymore.
Next you should learn what props or tools the artists use. Here are the ones I see most often:
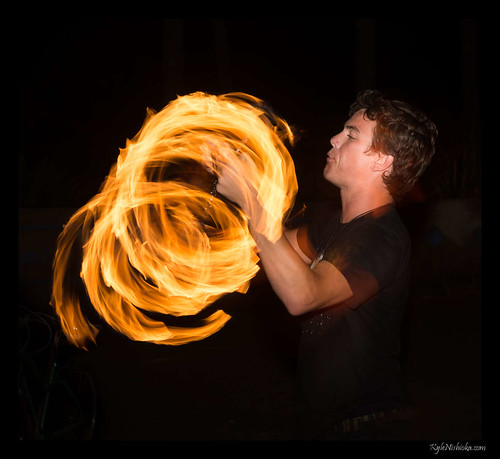
- Poi Balls. Fire spinning uses wicks on the end of a chain. The lengths of rope / chain are fairly short, about 2′ or less. Spinning poi is mostly close to the body of the artist and the glow from the fire will cause ghosting in your image. Poi spinners will often spin the poi right across or in front of their face. In a long exposure, if the fire crosses in front of the face of the performer the image in almost certainly unusable. The fire is too bright and obscures the face. I often stand to the side of the performer to get a clear shot of their face and the fire. But if you want to get a cool shot of the fire trail, you have to stand directly in front of the performer and just hope that the performer’s face will be in a clear spot when you trigger the flash.
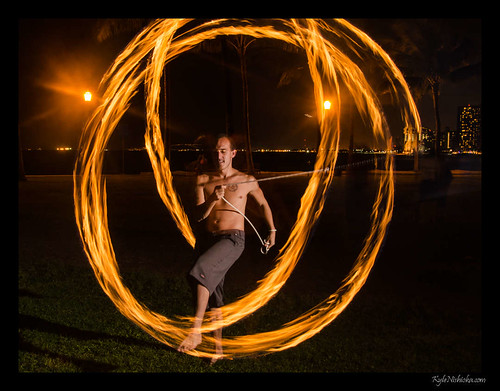
- Rope Dart. A wick on the end of a rope of varying length. The artist whips the wick around a lot and makes the biggest patterns I’ve seen. There’s often a lot of space within the pattern to get a clean photo of the artist. Of all the tools, the rope dart is the one I think should look best on video. The fire trails captured in a long exposure do not the artist justice since most of their performance will not be captured by the still image.
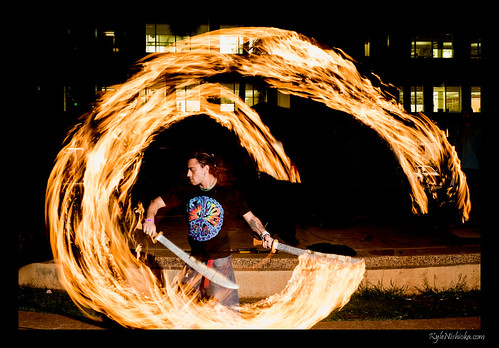
- Staff. Sometimes one big staff or two smaller batons. Wicks at both ends of the staff or baton. Fire artists love to throw these staffs and catch them in the air. The wicks on staffs are also one of the largest found on any tools and artists like to spin these staffs faster than the typical poi ball or hula hoop. Consequently the fire coming from a staff will be brighter than pretty much anything else. You may want to stop down to the smallest aperture of your lens when the staff spinner first comes on stage.
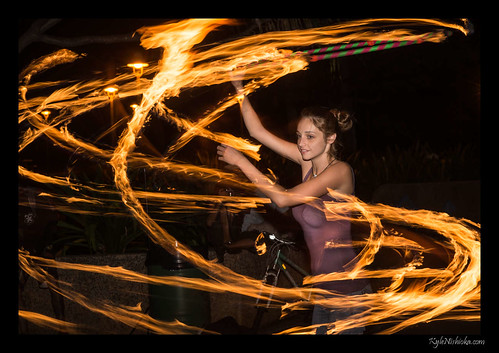
- Hoop. With four or six wicks on the hoop, these hula hoops are the most eye-catching of the fire artists’ tools. The hoop artist is rather difficult to photograph. The fire obscures the artist so easily that the good photos of fire hooping tend to have shorter trails and shorter exposures.
- Fire Fingers. Long dowels with wicks at the tips. Looks a bit like Freddy Krueger’s hardware but less menacing…until they are lit up. They really are extensions of the artist’s hands and the patterns they make are like painted brush strokes. Anticipate when the artist will draw something and the camera becomes the canvas.


That’s enough for now. Next time I’ll go into how to make the photo.
hi thank you.. how do you trigger the flash
Radio triggers. I used Cactus V5s and V6s for these photo although any brand of radio triggers will do.